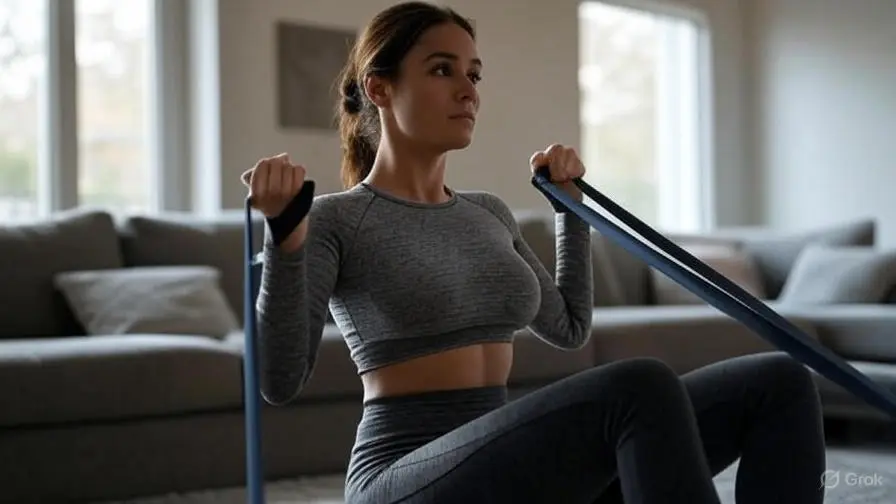
If you’re setting up a small home gym in India, resistance bands are the best first purchase you can make. They cost less than a single dumbbell, pack into a schoolbag, and cover strength, mobility and rehab. The tricky part is choosing the right kind. When you start browsing, you’ll run into unfamiliar terms—latex vs TPE, handled tubes vs loops, mini vs long, 4-tube vs 6-tube pedal exercisers, and grand claims about “equivalent kilograms” that rarely match real training.
This guide clears the doubts in simple words. We’ll start with material, because that decision affects feel, durability and skin-friendliness. Then we’ll look at band styles and resistance levels, how to progress safely, and what to buy for different goals. You’ll also find common mistakes to avoid, care tips so bands last, and a short checklist you can literally copy into your phone before ordering. By the end, you’ll know exactly what to buy today—and how to use it confidently tomorrow.
- Latex vs TPE — what they are
- Latex vs TPE — which Resistance Bands should you buy
- Band styles
- Resistance levels — how to read them and what to buy
- How to progress with resistance bands and keep making gains
- Safety & care — the unglamorous stuff that saves money
- What to buy (clear combos for different goals)
- Common mistakes to avoid (learn from others)
- Quick buying checklist (resistance bands)
- Sample 20-minute routine to start
- Conclusion
- FAQ-Resistance Bands
Latex vs TPE — what they are
Latex is natural rubber. Think of it as the original band material used in physio clinics and athletic gyms. Latex has a lively, springy feel: when you pull it, tension rises smoothly, and when you return, it “snaps” back in a controlled way that many people enjoy. That “snap-back” gives clear feedback to your muscles, especially during rows, presses and shoulder raises. Latex bands are easy to find in India, often priced well, and available in many shapes: handled tubes, loop bands, mini loops and even flat therapy bands. The two downsides are important to know. First, allergy—some people are sensitive to latex proteins and can get skin irritation or worse. Second, heat and sunlight speed up wear. If you leave latex bands on a balcony, in a hot car, or near a sunny window, they will age quickly, become sticky, and eventually crack. Kept in a cool, shaded place and wiped down after use, latex is excellent value and great to train with.
TPE (thermoplastic elastomer) is a latex-free synthetic blend. If you’re sensitive to latex—or you train in a warm room without air-conditioning—TPE is very practical. The feel is a little softer and less “snappy,” but still smooth through the range of motion. Beginners often appreciate this because the pull feels friendly rather than aggressive. TPE tends to tolerate heat better than latex, has a milder smell out of the packet, and is an easy recommendation for households where multiple people will share the same kit. You can find TPE in the same styles as latex: handled tubes, loops and mini loops. The only real drawback is that at the same thickness a TPE band can feel a touch lighter than a latex band, so you may want one step heavier if you already know you prefer strong resistance. In short, TPE is the safe, skin-friendly default when in doubt, while latex offers the most “athletic” feel if you can store and care for it properly.
Latex vs TPE — which Resistance Bands should you buy
If you love a lively feel, want maximum elasticity for presses, rows and curls, and can store your resistances bands away from sun and heat, go with latex. It gives excellent feedback for learning form and usually offers the best performance per rupee. If you (or someone at home) has any sensitivity to latex, or you train in a place that gets hot and bright during the day, choose TPE. You’ll lose a little of that classic “snap,” but you’ll gain comfort, tolerance and peace of mind. For most first-time buyers in India, the honest answer is that either material will work for home workouts. The bigger difference to your training will come from choosing the right style and resistance levels and then caring for the bands. If budget allows, some people keep both: a TPE kit for general use and hot days, and one or two latex loops for pull-ups or heavy rows where the lively feel shines.
Band styles
1) Handled tube sets (with a door anchor)
Handled tubes look like mini cable-machines you can hold. You clip one or more tubes to a handle, stand on the band or use a door anchor, and perform presses, rows, curls, triceps work and upright pulls. These sets are brilliant for anyone who likes dumbbell-like movements but wants a small, quiet setup. When buying, look for metal carabiners/rings, stitched webbing on the door anchor, and EVA/NBR foam handles that are comfortable for longer sets. The best part is stacking: if your kit lets you attach two or three tubes at once, you can fine-tune resistance without overstretching a single band. For apartments, handled tubes are a star: no clanks, no floor damage, and you can train while family members sleep.
2) Flat loops (mini and long)
Mini loops go around your thighs or ankles for glute and hip work—lateral walks, clamshells, kickbacks and monster walks. They’re tiny, cheap and transform warm-ups and posture. Long loops are continuous bands big enough to loop around a post or your feet. They help with assisted pull-ups, face pulls, rows, and mobility. If your goal is posture and joint health, a set of mini loops plus one medium long loop is a no-brainer. Check the seam finish and the thickness rating—you want even tension with no thin spots.
3) Pedal exercisers (4-tube or 6-tube)
A pedal exerciser anchors under your feet, so you don’t need doors or hooks. Slip your feet into the pedals, hold the top bar, and you can row, press, curl, do ab tucks and even light leg work. The 4-tube versions offer beginner-friendly resistance and shine for quick full-body circuits. The 6-tube models add more load for stronger users. They fold flat, weigh little, and are perfect for people who want zero setup and quiet, daily movement. If you want a specific, real-world pick to read about, see our review of the Proxism Pull Reducer (4 Tubes).
Resistance levels — how to read them and what to buy
Manufacturers often list “equivalent kilograms,” but these numbers vary wildly. Instead of chasing exact kg, think in useful ranges:
- Light: rehab, mobility, warm-ups, shoulder health, lateral raises (15–25 reps).
- Medium: most accessory work—rows, curls, presses, face pulls (10–20 reps).
- Heavy: compound pulls, assisted pull-ups, banded squats for stronger users (8–15 reps).
- Very heavy / stacked: two tubes clipped together, or a thick loop for serious pulls (6–12 reps).
For your first purchase, aim for 3–5 distinct levels. In handled kits, that means multiple tubes you can clip and stack. In loop kits, it means a pack with clearly marked tensions. Mini loops should also come in a set—you’ll use lighter ones for long sets and heavier ones when glutes get stronger. If you’re unsure, start with light + medium + heavy; you can fill gaps later. Remember: it’s much safer to stack two medium tubes than to yank a single light tube to its limit.
How to progress with resistance bands and keep making gains
Progress doesn’t only come from heavier tubes. You have four easy levers:
- Tempo — Slow the lowering (eccentric) to 3 seconds, pause for 1 second at the stretched position, then press or pull back. This triples the difficulty without changing bands.
- Range — Use full lockout and controlled return. Half-reps feel easier but build less strength, especially around the end ranges where joints need control.
- Volume — Add one set or a few reps. For example, move from 3×12 to 4×12, or from 10–12 reps to 12–15.
- Path — If space allows, step slightly farther from the anchor (within safe stretch) to pre-load the band. On clip systems, stack two tubes for a new middle setting that feels just right.
A good rule of thumb: if you can hit the top of your rep range with smooth form on two sessions in a row, it’s time to slow the tempo, add a set, or step up to the next tube.
Safety & care — the unglamorous stuff that saves money
This is the section that decides whether resistance bands last months or years. Start with inspection: every few weeks, run your fingers along each band. If you feel rough patches, sticky spots, cracks, or thinning, retire that band. It’s cheaper to replace a tube than visit a physio. Anchor smart: use the provided door anchor on the hinge side with the door fully closed; never anchor to brick edges, sharp table corners or rough rails. If you train barefoot at home, consider wearing shoes for standing moves—it spreads pressure on the band and protects your feet during pedal work. After sessions, wipe off sweat and body oils with a damp cloth, then store bands in a cool, shaded place. Avoid balconies, hot cars, sunny sills and bathroom steam. Do not overstretch—keep total elongation roughly under 2–2.5× the resting length. And control the return: don’t let bands sling back. A smooth eccentric is safer for the band and better for your joints and muscle growth.
What to buy (clear combos for different goals)
Mobility & toning (desk workers, beginners):
- One long loop (light or medium) for rows, face pulls and stretches.
- Mini loop set (light/medium/heavy) for glutes and hips.
- Optional: 4-tube pedal exerciser for quick circuits and core.
This setup fixes posture, wakes up hips and shoulders, and still lets you do light full-body work.
Budget strength (I want dumbbell-like moves without dumbbells):
- Handled tube kit with 5+ levels and clip-on design.
- Must include a stitched door anchor and metal carabiners.
- Add a heavy long loop later for assisted pull-ups.
You’ll progress by stacking tubes and using the anchor for presses and rows.
Travel kit (hotel rooms, hostels, carry-on only):
- One long loop (medium), one mini loop (medium), and a compact pedal exerciser.
- Everything fits in a laptop sleeve and covers cardio circuits, strength and mobility.
Future-proof (I know I’ll stick with it):
- Handled kit with spare tubes available separately + mini loop set.
- You can replace individual tubes as they wear and keep the rest of the kit going.

Common mistakes to avoid (learn from others)
- Buying a single band and expecting it to fit all exercises. Pull-ups and lateral raises don’t belong under the same tension. Get a range.
- Anchoring on rough or sharp surfaces. Bands fail quickly against brick edges, grills and old furniture. Use the door anchor or a smooth post with a towel.
- Overstretching “for more weight.” It’s safer and more effective to stack two tubes than to pull one tube to its limit.
- Leaving bands in sun or heat. Even TPE ages faster in harsh environments. Store cool and dry.
- Skipping the eccentric. Letting the band fly back cheats your muscles and shortens band life. Control down—feel every centimeter.
Quick buying checklist (resistance bands)
- Material: Latex (classic, lively feel) or TPE (latex-free, heat-tolerant).
- Levels: 3–5 distinct resistances (tubes you can clip/stack, or a loop set).
- Hardware: metal carabiners, stitched door anchor, comfy EVA/NBR handles.
- Style fit: handled tubes for cable-like moves; loops for mobility/hips; pedal exerciser for fast circuits.
- Spare parts/returns: replacement tubes available? Clear return window?
- Storage plan: cool, shaded spot; wipe after use; keep away from oils and cleaners.
Sample 20-minute routine to start
- Warm-up (2 minutes): neck rolls, shoulder circles, hip hinges, ankle pumps.
- Circuit (40s work / 20s rest × 3 rounds):
- Seated/anchored row (long loop or handled tubes)
- Overhead press (handled tubes or pedal exerciser)
- Biceps curl (handled tubes or pedal exerciser)
- Ab tuck (pedal exerciser)
- Glute bridge with mini loop (slow 3-sec lowers)
- Cool-down (2 minutes): chest opener with light loop, hamstring stretch.
Conclusion
Choosing the right resistance bands is simple once you focus on the big three: material, style, and levels. Pick latex resistance bands for that lively snap if you’re not sensitive and can store bands away from heat; choose TPE resistance bands if you want a latex-free, more heat-tolerant option. Then match the style to your routine: handled tubes (with a door anchor) for press/row/curl patterns, long/mini loops for mobility and hips, or a pedal exerciser for fast full-body circuits without anchors. Start with 3–5 resistance levels, and progress first with tempo, range, and volume before buying heavier bands. In most Indian homes, a handled tube kit or 4-tube pedal exerciser plus a mini-loop set will cover strength, posture, and travel. Make them last: inspect monthly, avoid sharp anchors and sun, and store cool and dry. Use the checklist above, pick a combo, and begin. Perfect gear isn’t the goal—consistent movement is. Start light, learn good form, and build momentum.
FAQ-Resistance Bands
Q1. Which resistance bands are better—Latex vs TPE resistance bands?
Both work. Latex has a lively, springy feel and is great value if you have no latex sensitivity and can store bands away from heat/sun. TPE is latex-free, more heat-tolerant and beginner-friendly. Pick latex for classic feedback; pick TPE for comfort and peace of mind.
Q2. How many resistance levels should I buy?
Start with three to five levels. This gives you a light option for rehab and mobility, a medium for most accessory work, and a heavy option for big pulls and assisted movements. In clip systems, you can stack two tubes to create middle settings.
Q3. Can resistance bands replace dumbbells?
For beginners and higher-rep strength, yes—bands can replace a small rack. For low-rep max strength, dumbbells and barbells still win. Many people use bands for warm-ups and accessories even when they lift weights.
Q4. How do I keep resistance bands from snapping?
Inspect monthly, avoid sharp anchors, keep total stretch under ~2–2.5× resting length, control the return (no slingshots), and store cool and dry. Replace tubes at the first signs of cracks or stickiness.
Q5. Are pedal exercisers good for beginners?
Yes. They anchor under your feet, set up in seconds, are very quiet, and cover full-body basics. If you want a simple daily habit tool, a 4-tube pedal exerciser is perfect; 6-tube suits stronger users. Read our Proxism Pull Reducer (4 Tubes) review.
Q6. What should I buy if my main goal is posture and joint health?
Get a mini loop set for glutes and a light/medium long loop for rows and face pulls. Do small sessions most days and sprinkle them between desk breaks.
Disclaimer
This guide is for fitness information only and not medical advice. If you have an injury or medical condition, talk to a qualified professional before starting or changing your exercise routine. Some of the link may be affiliate link and We may earn a commission from qualifying purchases—at no extra cost to you.
Buying Option

About the Author:
Madhu Roy is the founder of DealNXT.in, where she researches and shares honest product insights, deals, and practical buying guides. She focuses on researching online deals, comparing budget-friendly products, and creating practical buying guides for everyday shoppers, and her love for travel and everyday lifestyle shopping helps her understand what readers truly need. Her goal is to help people save time, avoid poor purchases, and shop smarter online with confidence.


